Spinning Yarn With Your Sewing Machine!

I love to spin yarn, maybe you do too. I spin it with a drop spindle, my kick spindle and my electric spinner. Sometimes I spin it with my sewing machine!

I recently completed two yarn projects using my Brother Dream Machine (a sewing and embroidery machine), but with the appropriate foot and accessories you should be able to do this on any sewing machine you own.

Sewing Machine Yarn:

machine_yarn5

For sewing machine yarn I complete the entire process using commercial or homespun yarn, along with thread, perhaps some ribbon, etc. For this yarn I used one strand of pink commercial cotton yarn, one strand of ultra-thin green commercial weaving yarn and one strand of blue knitting ribbon.

I set up “Dreamie’s” couching apparatus, dual feed foot (a type of walking foot in which the foot rolls along, maintaining constant contact with the base. A regular walking foot works well too) and couching foot (this has a hole in which the yarn passes through).

machine_yarn3

After aligning the three strands, I passed them through the hole on the couching foot, pulled the bundle to a position behind the needle and tied a knot to secure the ends.

I set the machine for a zigzag stitch, width of 2.5, length of 3.0.  I used regular sewing thread in the needle and the bobbin.

To make the yarn I stitched slowly, passing the bundle through the couching foot, twisting slightly as I went along.

machine_yarn4

Throughout the process, I held the bundle taught as it approached the foot and the completed yarn taut behind the foot. It’s important not to pull the yarn from behind, as this may break the needle. Just hold it taut and let your dual feed/walking foot bring the bundle through.

machine_yarn2

Although I used navy blue thread in this project, please feel free to experiment. If you don’t want the stitches to show, try using monofilament thread or matching thread. You don’t have to use regular sewing thread; you’ll see in my next project that I used machine embroidery thread!

After all the yarn was stitched, I wound it on my niddy noddy and formed a skein. Then I set the twist and “finished” the yarn, just as I do with all my handspun yarn. Finishing involves soaking the yarn in a solution of hot water, wool wash, a bit of vinegar (to set the color) and if desired, a splash of fabric softener. After soaking for about 15 minutes, I carefully rinsed and then squeezed it dry.  I snapped the skein between my hands a few times, rotating it so that the twist spread out evenly. Then I rolled it in a towel and hung it on the neck of a clothes hanger until it was dry. I often add an “S” clamp or a metal nutcracker to the bottom to add weight.

Fun, huh? If you don’t spin yarn but own a sewing machine and would like to make your own yarn, this is a terrific technique. Experiment with various commercial yarns, threads, ribbons and such. Just remember that your bundle needs to easily pass through the hole on the couching foot!

Machine Thread-Plied Yarn:

saffronthreadyarn3

A while back I “adopted” a white Icelandic sheep for 3 months. My sheep’s name was Ice and she provided me with several ounces of gorgeous roving.

Ice

I loosely spun the roving into a single-ply yarn, using my electric spinner (A Vespera, hand crafted by Heavenly Handspinning, http://www.heavenlyhandspinning.com).

I decided to have fun when it came to dying my yarn. I dyed it in a pot filled with water, lemon flavored Kool Aid, some dried turmeric and strands of saffron.

To machine ply the yarn I set up Dreamie (see above), but this time wound gold machine embroidery thread on the bobbin and thread the spool through the machine. Since the yarn was already on a skein, I set up my swift next to the machine.

saffronthreadyarn1

To ply the yarn, I simply passed the yarn through the couching foot, without twisting it. It had already been twisted when I spun it!

saffronthreadyarn2

Although I chose to use machine embroidery thread, feel free to experiment. You can obtain a wonderful, stretchy yarn by winding wooly nylon serger thread on a bobbin and another type of thread through the machine. Be sure you only use wooly nylon in the bobbin!

Upon completing the stitching, I “finished” the yarn in the usual way.

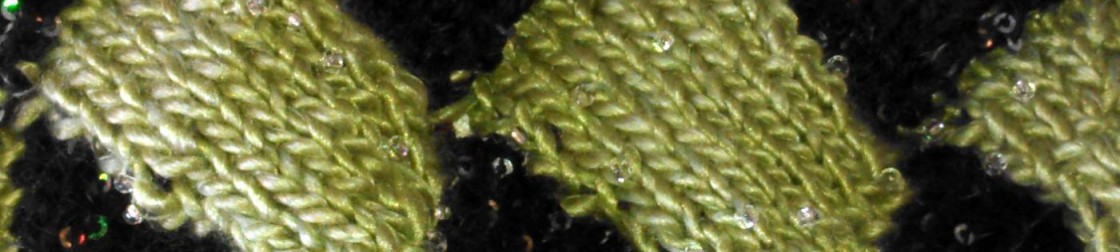
Here’s a close-up of the completed yarn:

saffronthreadyarn4

I hope you had as much fun reading about making sewing machine yarn as I had in explaining it to you. I also hope I’ve inspired you to make your very own custom yarn!

See you next time!


My First Paperback Knitting Pattern Book

Hi Everybody!

After selling my knitting patterns online for the last five years, today I published my first paperback knitting pattern collection. It’s called “Ten Adorable Knitting Patterns for Your Miniature Dachshund” and is available on Amazon in the United States, the UK, Germany, France, Germany, Italy and Spain. A downloadable e-book version is also available on all Amazon sites throughout the world.

bookcover

Here’s the link for the paperback edition:

https://www.amazon.com/gp/product/1520589883/ref=od_aui_detailpages00?ie=UTF8&psc=1


I’ve been BUSY!

Hi Everybody!

I hope this finds you all well, happy and busily involved in exciting projects. I’ve been productive since my last post, weaving, sewing, quilting, spinning yarn, art quilting and of course knitting.

This week I published my latest Miniature Dachshund dog sweater design. I call it “Looney Lions” and it’s published on my own website, as well as Etsy, Ravelry, Love Knitting, Craftsy and as an e-book on all Amazon sites throughout the world.

loony_lion_sweater1-copy

Here’s the link on my online website:

https://lenaslegacyhandknits.com/listing/511780385/pdf-download-knitting-pattern-for-lenas

In order to create the little loony lions, I employed some cable stitch techniques as well as short rows. The manes were made by tying small fringes through the stitches that encircled the face. Some silly paste-on buttons were perfect for the eyes!

In December, we enjoyed a fabulous week in Costa Rica. I took this photo of a Red Eyed Tree Frog:

frog_costarica

I digitized the image into machine embroidery using my Brother PE Design Next software and created this 14″ x 14″ art quilt, which is currently hanging on exhibit at Visions Art Museum (a fabulous art quilt and tapestry art museum!) in San Diego, California.

frog_costarica_quilt

Santa was very good to me this Christmas and I am now the proud owner of a 32″ wide Kromski Harp Forte rigid heddle loom. I love my original 15″ loom, but I wanted to expand my repertoire of woven garments. With my little loom, I had to sew a center back seam. Now I can weave a wider fabric that doesn’t need to be seamed! Last week I completed this kimono jacket:

gold_woven_kimono_completed

For the warp, I used Lion Brand Wool Ease worsted weight yarn, which is 80% acrylic, 20% wool and an 8-dent heddle. For the weft, I used a DK weight unlabeled wool yarn I found at a fiber arts fair. I created the fabric in just ONE warping! After “finishing” the fabric, I ended up with a length that was 72″ long and 25″ long. The 25″ edge became the length of my new garment. Using my trusty Brother 1034 D serger, I was able to cut one Back piece, two Front pieces and two sleeves. I used the serger to stitch the garment together.

A friend from Holland is an international flight attendant and when she visited me in December, she brought me a few rolls of colorful woven wool trim. I used some to edge the garment. I crocheted the neckband using the Reverse Crochet (Crab) Stitch.

That’s some of my latest news for now. See you next time!


Latest Knitting Design: “Lena’s Waffle Stitch Miniature Dachshund Sweater”

lenawafflesweater2

Hi Everybody!

My little Lena told me she’d like a new sweater for the Fall so I designed Lena’s Waffle Stitch Miniature Dachshund Sweater. It’s an easy knit for a beginner. The downloadable PDF pattern is for sale on all my online stores, including my lenaslegacyhandknits.com store for only $2.50. Here’s the link:

http://lenaslegacyhandknits.com/listing/460806008/pdf-knitting-pattern-download-for-lenas

It’s the perfect compliment for my “Easy Waffle Stitch Hat & Scarf Set!” A wonderful Mommy/Daddy and Me ensemble!

Lena says hello to all our friends out there!

Double Window Pane, Mock Waffle Weave Scarf on my Rigid Heddle Loom

cherrycofferedscarf

When I posted a photo of my latest weaving project on Facebook, one of my friends asked me if I’ll be publishing the pattern. In respect to copyright laws, I can’t do that because this is not my original pattern. However, I can cite the source and tell you how I completed the project.

So this is for you, Ute!

The pattern comes from my favorite source book on weaving, The Weaver’s Idea Book, Creative Cloth on a Rigid Heddle Loom by Jane Patrick. The book was published by Interweave in 2010. At first I got the digital version of the book and loved it, but soon discovered that the photos couldn’t be enlarged by pinching (un-pinching?) my fingers in the usual way and on my Kindle Fire, the images were just too darned small. So I invested in the hard cover version, which has generous color photos and sooooo much wonderful information. I highly recommend it.

Anyway, my rigid heddle loom is a 15” Schacht, attached to a stand. I love my little “Loomie.” For this project, I selected the 8-dent heddle. I warped along the central 7 inches/17.75 cm with Lion Brand acrylic Heartland worsted weight yarn (Color Biscayne). I used direct warping at 100 inches/2.5 meters. If you are new to rigid heddle loom weaving, I should tell you that you have to factor loom waste and shrinkage when you estimate the length of the warp. I always add at least 18”/45.5 cm plus 10% of my desired finished length. Then I may throw in a few more inches for good measure. For the weft, you can figure about 2/3 the amount you used for the warp, but to be safe, I like to factor in the same amount as the warp.

For the weft, I used worsted weight 100% silk yarn I purchased at a fabulous discounted price from my favorite online yarn supplier, http://www.discontinuedbrandnameyarn.com. The yarn is by Creatively Dyed Yarns, Colorway Asia. It comes in skeins of approximately 80 yards/73 meters, 1.75 oz/50 g each. I used 2 skeins.

After dressing the loom, I wove a few picks with waste acrylic yarn to get the project started. Using the weft yarn, I plain wove 2 picks, then did a 2-pick, 2-thread edge stitch to secure the warp threads.

cherryscarfinprogress

The pattern stitch is a 10-pick repeat with a pick-up stick pattern (with the heddle in the down position) of 2 up, 2 down, ending with 2 down. When I was finishing the stick repeat, I found I had 3 threads remaining. In this situation, I often cut off the offending extra thread, but this time I went ahead and completed the threading with 3 down.

Here’s the sequence:

Step 1: Heddle up.

Step 2: Pick-up stick (heddle in the Neutral position, slide stick to just behind the heddle and turn it on its side).

Step 3: Heddle up.

Step 4: Pick-up stick (see Step 2).

Step 5: Heddle up.

Step 6: Heddle down.

Step 7: Heddle up and pick-up stick (heddle in the Up position, slide stick to just behind the heddle and keep it flat).

Step 8: Heddle down.

Step 9: Heddle up and pick-up stick (see Step 7).

Step 10: Heddle down.

Repeat Steps 1 – 10 for pattern.

I kept going like this until I had about 70”/178 cm, which was about when my second skein of weft yarn was about to run out. I wanted each end of the scarf to match, so I completed Step 4, then did 1 pick of plain weave, followed by 2 more picks, with the 2-pick, 2-thread edge stitch on the last 2 picks.

After removing the project from Loomie, I trimmed the warp threads to about 5”/12.5 cm and worked on the Czech glass bead edging. After threading one bead on to each thread, I paired the threads and secured the beads with square knots.

I filled the kitchen sink with fairly hot water, added gentle detergent, a bit of my personal hair conditioner and some white vinegar (to set the color). I soaked the scarf for 15 minutes, returning often to gently squeeze water through it. After that, I rolled it in a towel to remove excess water, put it in a lingerie bag and spun it in my washing machine in the Permanent Press spin cycle. And after that, I dried it in the dryer at the Permanent Press setting for just a few minutes, until the scarf was damp dry.

I completed the drying process by hanging the scarf to dry. Once dry, I steamed both sides and let it dry again.

The final step was to trim yarn tails on the back of the scarf and the fringes to 2”/5 cm.

Very often, knitting, crochet and weaving beginners want to trim yarn tails and fringes before the final “finishing” of their fabric. Not a good idea, because finishing shrinks the yarns. So you’ll notice I didn’t trim yarn tails or the fringes to their final length until the project was completely and thoroughly wet finished.

The final dimensions of my scarf is about 68”/172.7 cm by 5 ½”/14 cm.

It sure is a beauty!


Really Easy Flame Lace Scarf Pattern Just Published!

flamelacescarfasmazon

I love designing easy to knit patterns for beginner knitters and more advanced knitters looking for a quick and easy project. I came up with this lovely, light, breezy lace pattern. It’s knit with DK weight yarn on US #7/4.5 mm needles. The downloadable pattern is available on my online store for only $2.50. Here’s the link:

http://lenaslegacyhandknits.com/listing/458469670/pdf-download-pattern-for-the-really-easy


My Latest Knitting Design Pattern: Easy Waffle Stitch Hat and Scarf Set

waffle_hat_scarf

Hi Everybody!

If you’re looking for a super easy and quick knit hat and scarf set suitable for beginners, I’ve come up with a terrific design for you. It’s knit with DK/light worsted weight yarn and US #6/4mm needles. The pattern includes instructions to make the scarf and hat and I’ve included tutorials on making the i-Cord (knitted cord) loop on the hat as well as how to fashion fringes.

The pattern is available for sale for only $3.00 on all my online stores. Here’s the link to my personal online shop:

http://lenaslegacyhandknits.com/listing/470089673/pdf-download-for-easy-waffle-hat-scarf

waffle_hat_etsy


Stepping Outside My Comfort Zone at the 2016 Orange County Fair Competitions

I consider myself primarily a knitter and for decades I’ve been entering my knitting designs and projects in our annual Orange County (California) Fair fiber arts competition. And for decades the judges have smiled on me and awarded me with numerous awards. Recently, however, I decided to venture outside of my comfort zone and learn how to spin yarn, weave, machine embroider and explore other fiber arts. Competing is fun and I enjoy sharing my projects with attendees at the Fair, so my entries this year included:

My “Circus Fanfare” handspun yarn, spun on my drop spindle. I blended various natural fibers with commercial yarn to come up with this. It won a 1st place prize in the Hand Spun Yarn category.

circus_art_yarn2

ocfair2016artandwotan

In an earlier post, I described my adventure spinning yarn out of Wotan the wolf’s fur. Wotan’s yarn, also spun on my drop spindle, came in 2nd.

wolf_bluefacedleicester_yarn1

ocfair2016wotan

In the same Weaving & Spinning Division, I entered my hand woven scarf and hat set, woven on my rigid heddle loom with yarn I spun myself. It won a 1st place ribbon and was the Division Winner! Very exciting!

beaded_fringe_scarf1 - Copy

silver_studded_woven

ocfair2016divwin

I’m learning how to convert photos and other images into machine embroidery designs and made a framed art quilt out of our miniature dachshund’s photo. Lena is very photogenic, don’t you think? My efforts got me a 2nd place prize.

ocfair2016lena

I’m having a lot of fun learning how to make art quilts and fiber arts wall hangings. A special feature of this type of art is the use of surface design, which includes a variety of techniques to add texture and interest to the surface of the work. For my crazy weird wall hanging, I first wove fabric out of my handspun paper/fiber yarn that came in 1st place in last year’s spinning competition. After removing the fabric from my loom, I cut it into strips and “wove” the strips together, the way we used to do with strips of colored paper when we were kids. For the two tiles, I inserted pieces of fabric, thread and yarn between the sheets of plastic report covers and sealed the edges with an iron. I made beads by rolling plastic straws in strips of fabric, gluing the edges together and adding yarn and commercial beads to them. I embellished the center with shiny gold Angelina fiber and a very strange ocular looking glass bead I found at a bead market. Then I sewed the piece to a fabric backing and added a hanging sleeve. I guess the judges like weird stuff because it came in 1st!

weavingwallhangin

ocfair2016wallhanging

If you have a County or State Fair where you live and have the opportunity to compete, I encourage you to do so. Winning ribbons is a lot of fun, but the real satisfaction, at least to me, is striving for one’s best work and then sharing it with the world. Our efforts do inspire others!

When Life Brings Fluff, DROP and SPINDLE!

dropspindlepostcard

If you or somebody you love is passionate about spinning yarn with a drop spindle, my original machine embroidered post card may be for you. The card reads “When Life Brings Fluff, DROP and SPINDLE!”  I have several post cards for sale. These come with 5 x 7 inch envelopes but can be mailed without the envelope. For more information and to purchase a card please visit my online shop at:

http://lenaslegacyhandknits.com/shop/19159746/machine-embroidery


Quick and Easy Gift Projects – Spa Cloths, Soap Bag & Gift Basket Set

bathroom_set1

As I write this, Mother’s Day is only a few days away. If you’re looking for a quick gift for Mom that will be ready in time for her special day, or you’re thinking about making some quick and easy hostess gifts or for early Christmas gift projects, I hope you’ll check out my Spa Cloths and Soap Bag pattern collection.

The patterns include photo tutorials on how to do the Tunisian Crochet Simple Stitch, how to make a knitted iCord and how to make a cord using the ancient Viking era lucet. I also explain how to turn a dish cloth into a gift basket!

You’ll find it on my online store:

http://lenaslegacyhandknits.com/listing/195851720/pdf-download-for-easy-knittunisian